< THE ART D.I.E.T.
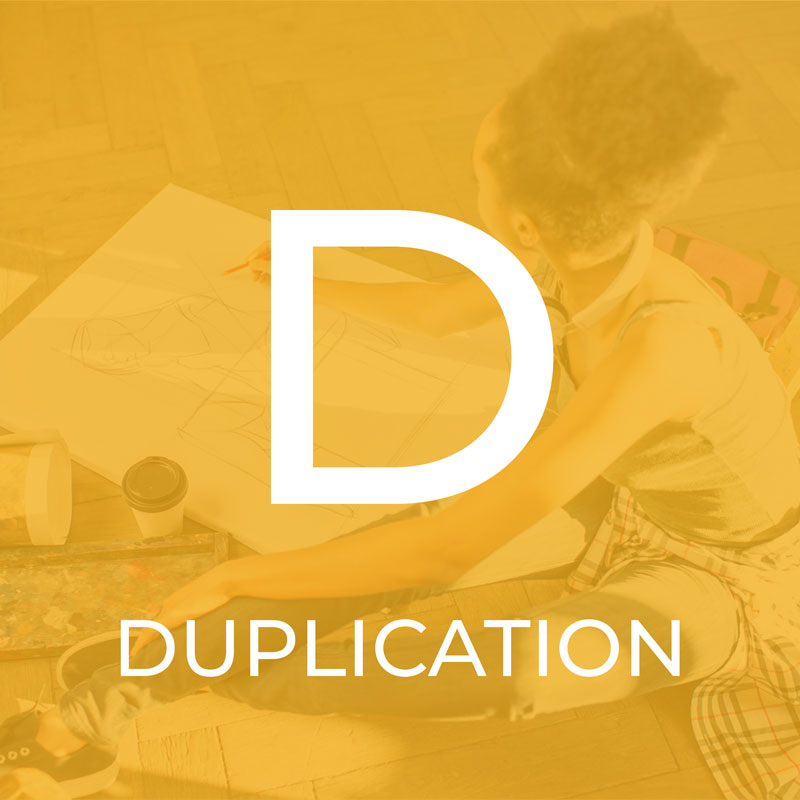
DUPLICATION
Duplication is the ability to accurately draw what you see
This is a skill that can constantly seem out of reach. After a period of frustration, many artists conclude that they just aren’t talented enough to draw well. But that is a misconception! Drawing accurately is not something you’re born with. It is a skill like any other that just needs the right tools and guidance. Most importantly, it’s important you believe that it can be learned. As a first step, try forgetting about learning to draw accurately and focus on learning to observe accurately.
The good news is that there are four powerful observational tools that are not subject to opinion or preference. Like math equations, they either add up or they don’t!


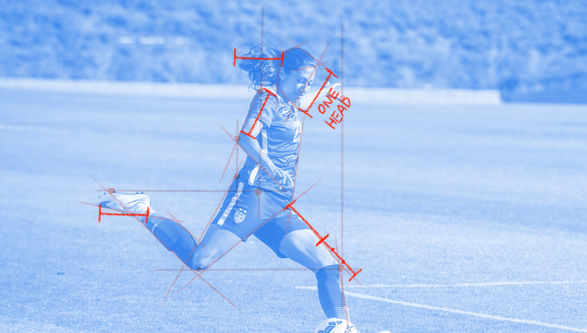
Tool #1: Plumb Lines
Plumb lines are what builders have used for centuries to make sure elements line up vertically with each other. In it’s simplest form, tie a heavy object to the end of a string and let it hang. Once the string settles, you’ve got a perfectly vertical (or “plumb”) line, perpendicular to the earth’s surface. When drawing, we can use this concept to line things up vertically. We also use it for horizontal alignment (even though in real life that would be impossible).
Here’s how you use it:
Identify two things in your source material that line up with each other. If you’re copying an image, use a ruler or the edge of a piece of paper to confirm that they line up either vertically (up and down) or horizontally (side to side). If you’re drawing from life, then close one eye, stretch out your arm and use your pencil to determine which two things line up.
Next, on you drawing, draw a single straight line. This will be where your two corresponding elements must line up. Put a light mark where the first element will be, then make a decision about where the second element will be. As you will see, this first decision will inform all other marks on the page.


Tool #2: Angles
Angles are exactly the same as plumb lines, but… they are at an angle! Learning to estimate angles is hard at first, but you’ll quickly get better with time. Angles have two key, observable aspects: a direction and a relationship to a plumb line (which creates a triangular corner shape). Accurately estimating those two traits will give you the right angle.
Here’s how you use it:
On your source material, identify (or draw) an angled line that describes the edge of a form. Try to notice how this angled line relates to existing plumb lines. If needed, identify new plumb lines to help understand it’s location and direction.
On your drawing, try your best to draw a corresponding line that matches the angle and position of the line on your source material. Draw any additional plumb lines you need in order to make sure that your angled line matches the source material accurately. Holding it up to the source material, use your pencil or stylus to physically compare the angles between your source material and your drawing. If you notice any differences, correct your drawn line.


Tool #3: Distances
Comparing distances between elements helps us maintain correct proportions throughout our drawing.
Here’s how you use it:
On your source material, take note of a specific measurement (e.g. the height of a head). This will become a unit of measurement for other parts of the drawing. For example, you might note that the length of another form equals “one and a half heads”, or “three heads”.
On your drawing, make and compare corresponding measurements as you lay in your shapes.

Tool #4: Negative Shapes
Negative shapes are the spaces outside of the main silhouettes. Learning to see negative shapes is like putting on another pair of glasses that immediately identifies mistakes in proportion and accuracy.
Here’s how you use it:
On your source material, try to ignore the forms of the main subject and actively look at the shapes that make up the surrounding areas.
On your drawing, use the three previous tools (plumb lines, angles and distances) to draw and adjust the negative shapes. Switching between drawing the positive and negative shapes will result in an accurate drawing.
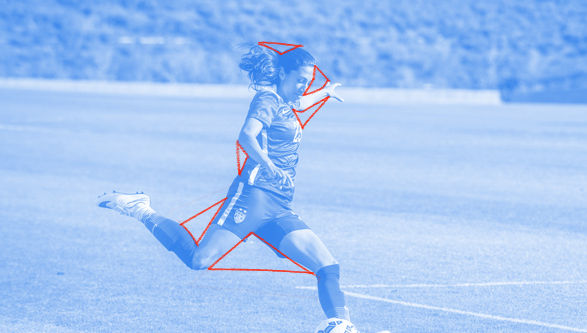
Actively switching and using these four tools throughout the drawing session will result in a scaffold, or cage, that will quickly start to resemble your source material!
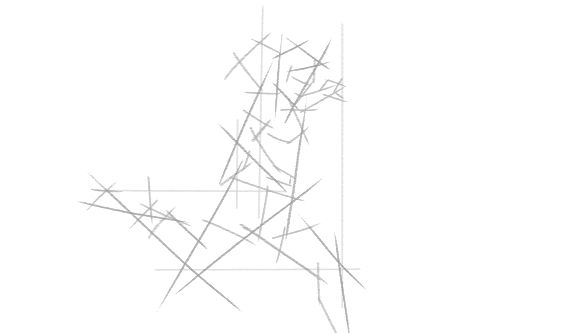
These construction lines should be made with very light lines so that you can keep erasing and adjusting them as needed. With practice, you’ll be erasing less and less until your ability to estimate and create accurate scaffolds is second nature. The last step is to create the secondary forms, add details, and your drawing is done!
is duplication really that important?
One-to-one duplication is not the ultimate goal of every piece of art. But it is an essential skill to master if you want to be a versatile artist. When working for clients in the real world, you’ll need to accurately duplicate rhythms, products, locations and model likenesses. Many artists are creative and produce lots of inventive art, but cannot duplicate well and are often on the losing end when competing with artists who can. They also get stuck in a narrow artistic style that may not have much of an audience. If you want to become an artist that is able to adapt to the needs of a client, you should make it a priority to be comfortable and proficient accurately duplicating what you see.
UPSIDE-DOWN DRAWING
In 1979, Betty Edwards published the book, Drawing on the Right Side of the Brain. It introduced ideas and research that made people realize that drawing is something that can be learned, regardless of our genetics or perceived talents.
In one of her most famous exercises, Betty instructs students to draw from an image that is upside down. Because our “left brain”, the side that analyses data and forms conclusions based on what we already know, doesn’t immediately recognize what we’re seeing, our “right brain” takes over and begins to process things in a way that prioritizes observation, intuition and rhythm.

Try it!
If you’re someone who doesn’t think they can draw: Pick your favorite cartoon character and search Google for “[your character] character sheet”. Find a pose you like, print it out, and then try drawing it with the source material upside down. Starting out with black and white line art is best. Some people find that drawing a box around both the source art and the drawing makes finding shapes easier. (This makes sense because you’re really just creating four plumb lines to draw against!) Don’t flip your drawing until you’re done so that you don’t undo the effects of “resetting” the way your brain is percieving what you’re seeing.
Once you’re done copying every line, flip it right side up. Even though you may not have duplicated it in the most accurate way, you will be surprised at how well your hand and brain actually coordinated to draw something you observed! This will give you the confidence you need to realize that accurate drawing is absolutely within your reach as long as you invest enough time and effort.
Here’s some line art from one of my all time favorite 2D animated films, “Cats Don’t Dance” (Scott Bakula, Natalie Cole) !
And while we’re at it, you need to watch this scene from the movie, featuring Darla Dimples, (possibly the best villain in a non-Disney film):
You can train your brain to be more observant by doing these exercises everyday, while you’re on the bus, when youre waiting at the doctor’s office, or during a really boring office meeting.
- Practice measuring the lengths of two objects in your mind, then use your finger or a pen to check your accuracy
- On a sheet of paper, estimate and mark off what you think are 1/2, 1/3 and 1/4 divisions. Then fold the paper to check your accuracy
- Practice identifying things that are on the same vertical or horizontal plumb line. Double check with the edge of your phone or other object.
METHODS of the art D.I.E.T.
Once a week, focus your learning time on one of these four methods.